Telesto Hosting basics walk-through
Wether you have purchased one of our hosting packages, or are looking at doing so: this article will show you around the essentials of our hosting services. If you are interested in finding out more about our hosting, you can do so here.
After this article you’ll have all the knowledge you should need to get started with creating your sites, as we quickly cover all the different parts in our user panel. We’ll also have more in depth posts about select sections that require them. Let’s get started!
Table of Contents
The user panel
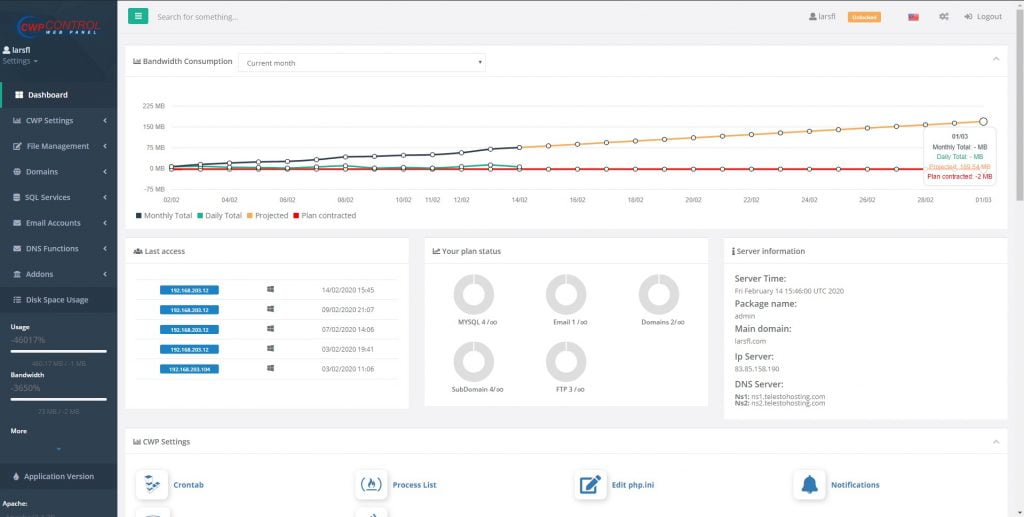
Our user panel allows for you to customize and manage virtually every part about your site. Everything from DNS, installing WordPress, managing FTP or uploading files can be done from here, and more. After having signed up to our hosting, you’ll receive an email with login code and username. With this code and username, navigate here and log in. After doing so you’ll be greeted with a screen looking something like this.

Information here included your hosting plan status, server information and links to important settings. We will briefly go over those now
CWP Settings
Our hosting uses CWP as panel, and under this tab you can find some settings that apply to just you. You can set up notifications for certain things, or view statics. Crontab is also available for advanced users. You probably won’t spend much time at all on this tab
File management
Under this tab you can manage all of our files in two ways. Either you can set up an FTP account, or use our file manager. Furthermore there are settings regarding security and backups.
Domains
This tab is probably the first one you’ll want to explore once you first log in. Here you can set up your domain, SSL certificates and sub-domains if needed. To see how many domains your hosting plan allows, see the upper right corner.
SQL Services
For any WordPress site you’ll want to set up a SQL database and user, this tab will allow you to easily log into phpMyAdmin or manage it from this very panel with the MySQL manager
Email Accounts
If you’re building a site with any form of user or customer interaction, it’s professional to use a custom email domain. Under this tab you can find the necessary settings for doing it with an external email client, but also easy setup for doing it within the panel. Once you’ve made your new mailbox (ending in a domain that you own, like info@telestohosting.com) you can log in and start sending. You can also setup AutoResponders to let your users know if email have been received.
DNS Functions
Using the DNS Zone editor you can edit your DNS records from our panel. This only applies if you’re using our nameservers for your domain. If you don’t know what nameservers are, you might want to hold off on touching these settings
Closing words
With that we’ve finished our very brief look at our user panel. If you want to learn more about any of the functionality shown here, you can check out our other support posts. If we haven’t yet covered the one you want to know more about, or have any other questions, you can contact our support here.


